Rails 6 with Bootstrap 4 Technology
Rails with Bootstrap is a combo I’ve found myself using for quite some time now due to how easy it is to get an application up and running quickly. Historically, pre Rails 6, most would typically use a gem to add bootstrap to their application. With the move to Rails 6, the preferred way to achieve this is via Webpacker. When I moved to Rails 6, I found myself faffing around trying to get it working so I decided to create a blog post documenting how.
I’ve also create a github repo containing a blank rails 6 project with bootstrap enabled here.
It also comes bundled with the High Voltage (and I may add bootswatch themes in the future also)
Its mainly for myself so I can fork the repo to quickly development new bootstrap rails apps but its of coarse open for anyone to use.
In any case, the following steps will demonstrate out to do this from scratch.
1. Create a new blank Rails application
Ensure you have the latest version of Rails installed via rails -v. For me, I’m using rails 6.0.2.2.
I’d also recommend setting up rbenv so you can configure different ruby versions in your environment.
I’m running ruby version 2.6.3p62.
In order to create a blank rails application, run the following command
rails new my_app
After the app gets created and all the required gems are installed, you can verify the app via
cd my_app
rails server
Your blank app should be running at http://127.0.0.1:3000/. (You should see ‘Yay! You’re on Rails!’)
2. Setup a custom welcome page
Before we set up Bootstrap, lets create a welcome page where we can verify Bootstrap is running on our application. We can do this via a simple welcome index.
rails generate controller welcome index
This will create the desired files for a welcome index. Lets make this the root of the application
# config/routes.rb
# ...
get 'welcome/index'
root 'welcome#index'
We can also add some bootstrap code to this index page. Although it wont work just yet, it will once we enable bootstrap
<% # /app/views/welcome/index.html.erb %>
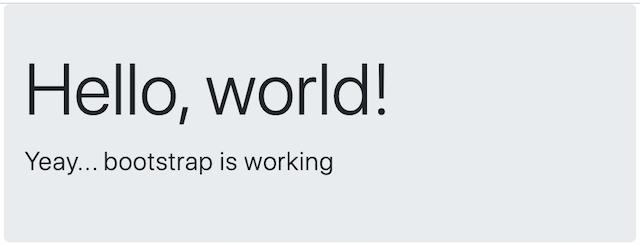
<div class="jumbotron">
  <h1 class="display-4">Hello, world!</h1>
  <p class="lead">Yeay... bootstrap is working</p>
</div>
Now, refreshing http://127.0.0.1:3000/ should no longer render the default rails page. You should see a bootstrap-less h1 Hello, world.
3. Add desired packages via Yarn
In order to get bootstrap working, we’ll need to use Yarn to add the packages we need. We’ll need jquery + popper.js to ensure all aspects of bootstrap work. expose-loader is also needed so that the modules will work with webpacker (specifically so jQuery is available globally).
yarn add bootstrap jquery popper.js expose-loader
Note: nodejs is required to use yarn. Im on v13.10.1. You can verify its installed by running node -v
3. Configure webpacker in your application & enable Bootstrap
Webpacker needs to see jQuery so that it will work, to enable it add the following:
// config/webpack/environment.js
const { environment } = require('@rails/webpacker')

environment.loaders.append('expose', {
    test: require.resolve('jquery'),
    use: [
        {
            loader: 'expose-loader',
            options: 'jQuery',
        },
        {
            loader: 'expose-loader',
            options: '$',
        },
    ],
});

module.exports = environment
Next, we should enable both tooltip and popover. These are useful components available via Boostrap
// app/javascript/packs/application.js
// ...
import $ from 'jquery';
import 'bootstrap/dist/js/bootstrap';

$(document).on('turbolinks:load', function() {
    $('body').tooltip({
        selector: '[data-toggle="tooltip"]',
        container: 'body',
    });

    $('body').popover({
        selector: '[data-toggle="popover"]',
        container: 'body',
        html: true,
        trigger: 'hover',
    });
});
And also import the bootstrap styles. You can create a dedicated directory for this otherwise just put it inside the /app/javascripts/packs directory.
// app/javascript/packs/styles.scss

@import '~bootstrap/scss/bootstrap';
The webpacker config file has an extract_css attribute that we can enable.
With extract_css: true, webpacker will emit a css file from each stylesheet_pack_tag in application.html.erb.
Its enabled by default in production but set to false by default in development mode, lets set it to true so its enabled in development also
# config/webpacker.yml
...
extract_css: true
4. Pull in your webpacker assets into your application and restart
The final step is to tell rails to use your webpacker assets using the webpacker helper function called stylesheet_pack_tag.
So, we can replace the stylesheet_link_tag with this webpacker function
<%= stylesheet_pack_tag 'application', media: 'all', 'data-turbolinks-track': 'reload' %>
You might also want to wrap the main contents of the page body in a container div as per standard bootstrap practice.
<div class='container'>
  <%= yield %>
</div>
Finally, start the webpack dev server and start/restart you rails server and refresh the page
bin/webpack-dev-server
bin/rails s
If everything worked as expected, you should see the following:
